
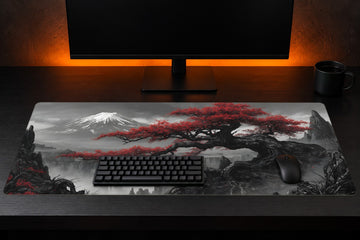
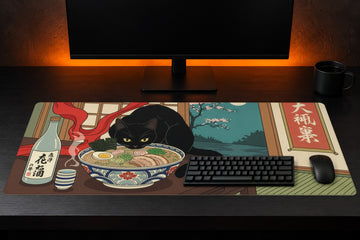
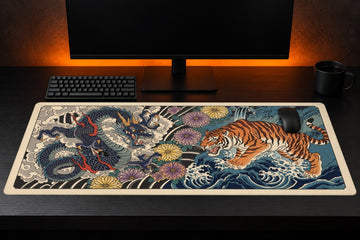

To make your own mouse pad, choose the mat size first. Then use a picture with enough pixels for that size: about 150 pixels per inch of the mat. Crop it to the mat's shape and keep faces, words and logos at least 2.5 cm inside every edge. Upload it on the custom product page for that size, and the mat is printed to order.
That covers the basics. The rest of this guide goes through each step so your own picture comes out sharp and sits where you want it, whether it's a small mouse pad or a desk mat that covers half your desk.
Step 1: Choose the size before you choose the picture
The size decides almost everything else: how many pixels you need, how your picture gets cropped, and what ends up hidden under the keyboard. A picture that looks great on a small mouse pad can look stretched thin on a long desk mat, because the shapes are so different.
An S is 35 x 25 cm, a compact rectangle with room for the mouse only. The desk mats are long strips. An M is 70 x 30 cm and an L Extended is 90 x 30 cm. Deeper mats like an XL at 80 x 40 cm or an XXL at 90 x 40 cm sit under both the keyboard and the mouse with room to spare.
Measure your keyboard before you pick. A full-size keyboard with a number pad is about 44 to 46 cm wide, a tenkeyless (TKL) about 36 cm, and a 60% about 29 cm. A mouse is about 12 cm long, so it needs a good stretch of mat to move on. On a 70 cm wide M, a TKL leaves about 34 cm beside it for the mouse. On a 90 cm wide mat, even a full-size keyboard leaves about 44 to 46 cm. The desk mat size guide shows every size against a real desk if you're torn between two.
How many pixels does a custom mouse pad picture need?
A picture prints sharp at about 150 pixels per inch of the mat's size or more. Below that the print gets softer, and you notice it most on photos of people and on small text. Here is what that works out to for each size:
| Size | Mat (cm) | Mat (inches) | Pixels for a sharp print (about) |
|---|---|---|---|
| S | 35 x 25 | 13.8 x 9.8 | 2,067 x 1,476 |
| M | 70 x 30 | 27.6 x 11.8 | 4,134 x 1,772 |
| Large | 80 x 30 | 31.5 x 11.8 | 4,724 x 1,772 |
| L Extended | 90 x 30 | 35.4 x 11.8 | 5,315 x 1,772 |
| XL | 80 x 40 | 31.5 x 15.7 | 4,724 x 2,362 |
| XXL | 90 x 40 | 35.4 x 15.7 | 5,315 x 2,362 |
| XXXL | 100 x 50 | 39.4 x 19.7 | 5,906 x 2,953 |
| Extreme | 120 x 50 | 47.2 x 19.7 | 7,087 x 2,953 |
These numbers apply to the part of the picture you keep after cropping, not the whole file. If you crop a long strip out of a photo, only that strip's pixels count.
How to check your picture's size
On a computer, the file's properties or info panel lists its width and height in pixels. Most phone photo apps show the same thing in the photo's details. Look for the original file. Screenshots, pictures saved from social media and photos passed through messaging apps are often shrunk along the way, so they can have far fewer pixels than the photo you first took.
What if my picture is too small?
You have a few honest options. Pick a smaller size: the S custom mouse pad needs about 2,067 x 1,476 pixels, far fewer than any desk mat. Crop less, so more of the picture's pixels stay in the print. Or choose a different picture. Soft subjects like skies, water and painted textures hide a slightly soft print better than faces or lettering. Stretching a small picture in an editor adds pixels but not detail, so it rarely fixes the problem.

Crop your picture to the mat's shape
Every desk mat is much wider than it is tall. An L Extended is three times as wide as it is deep. Most phone photos are much closer to square, so the picture will be trimmed to fill the mat, and you get to decide which part stays.
- Wide landscapes and panoramas suit long mats like an M, a Large or an L Extended. Most of the picture stays in.
- Upright photos, like a portrait of a person or a pet, lose most of their height on a long mat. Use a deeper size, or place the subject at one end and let the background fill the rest.
- Group photos need the whole row of people to fit across the width. Check that nobody at the ends falls outside the crop.
If you design in Photoshop, the size templates for designers give you a file at the exact shape of each mat. Build on the template and your layout fits the crop with nothing unexpectedly cut off.
Think about where the keyboard and mouse will sit
A keyboard is about 13 to 15 cm deep, so on a 30 cm deep mat it covers roughly half the height of the print wherever it sits. A face placed dead centre often ends up under the keys. Before you upload, picture your keyboard lying on your design. Put the part you most want to see where nothing will cover it, such as the mouse side, the far end, or the strip above the keys on a deeper mat like the XXL custom desk mat.

Where the edges go: the safe area and the stitching
The upload guide on every custom product page shows a safe area 2.5 cm inside every edge. Anything important belongs inside it: faces, names, words and logos. The outer band still prints, but it sits close to the stitched edge, so keep it for background.
Two things make that band matter. First, the stitching wraps the rim of the mat. Second, finished sizes can vary by 0.5 to 1 cm because of heat shrinkage during printing. A detail that sits right at the edge in your file can end up partly under the stitching or slightly trimmed.
- Run the background all the way out. Let colour or scenery fill to the very edge of the file so no white gap can show.
- Skip thin borders and frame lines. With up to 1 cm of shrinkage, a thin frame near the edge can look uneven from one side to the other.
- Give words room. Keep text well inside the safe area and make it large enough to read from your chair. Small text shows any softness first.
What to avoid
- Screenshots and pictures saved from social media, which are usually far smaller than the original.
- Heavy zoom crops from a small part of a photo, which leave too few pixels for a desk mat.
- Faces or text in the centre of a long mat, where the keyboard will cover them.
- Important details in the outer 2.5 cm, near the stitched edge.
- Very dark photos. Shadow detail that's hard to see on a bright screen is harder still to see on fabric.
- Pictures you don't have the right to print. Use your own photos, your own artwork, or work you have permission to use.
Making an RGB version
An RGB custom print mat comes in M, Large, L Extended, XL, XXL and XXXL, with a light running through the stitched edge. The same picture rules apply. Keep the main subject well inside the safe area so the glow frames it rather than crossing it. Never fold or pull an RGB mat.
After you order: printing, timing and care
Every mat is printed by dye-sublimation, which bonds the ink into the fabric instead of leaving it on top. The mats are 4 mm thick with stitched edges, a smooth fabric top and an anti-slip base.
Each custom mat is printed when you order, so allow 1 to 3 business days for production before it ships. Shipping takes 7 to 14 business days to the US, UK, Canada and Australia, and 14 to 21 business days to the rest of the world, not counting customs delays. The shipping times page has the details.
To keep the print looking good, regular mats are machine washable on cold with a low tumble. Never use hot water, and let the mat air dry for at least 24 to 36 hours before you use it. Never put a wired RGB mat in water. Wipe it with a damp cloth instead, as the cleaning instructions explain. If you're unsure whether a picture will work, email support@epicdesignpads.com. The team answers within 36 hours.
Quick checklist before you upload
- Choose your size by measuring your keyboard and the room your mouse needs.
- Check that the part of the picture you keep has about 150 pixels per inch of that size.
- Use the original file, not a screenshot or a forwarded copy.
- Crop to the mat's shape and choose which part of the picture stays.
- Keep faces, words and logos at least 2.5 cm inside every edge and clear of where the keyboard will sit.
- Let the background run to the very edge, with no thin borders.
When your picture passes the checklist, browse the custom print mouse pads, open the page for your size and upload it there.